If you recently had your brake line or calipers replaced, there are high chances that you introduced air into the braking system. As time passes, the volume of air becomes trapped in the brake lines causing a soft or “mushy” feeling, when putting your foot on the brake pedal. This is not only an inconvenience but also a safety issue, as your brakes may not be able to perform optimally (increasing stopping time significantly). How can you fix this?
Well, this is where “Gravity Bleeding” your brakes might prove handy, which manipulates the tubing to release trapped air bubbles. This remedy is a sure-fire and easy way that can ensure your brakes function perfectly. It can be done within 30 minutes, but you may require a helping hand. Look at this detailed guide below to learn why gravity bleeding is necessary and how to perform the process one step at a time.
More...
Why Is Gravity Bleeding Brakes Necessary?
Brake bleeding is a typical repair job for when you start feeling the pedal getting soft and notice a reduction in stopping power and time. It is a process, which has to be done throughout the lifespan of your car or whenever you have your brake pads, calipers and lines replaced. Think of it as a dreaded trip to the doctor where they have to take out blood, but the only difference is that gravity bleeding brakes is not painful and removes air bubbles from the braking system.
Bear in mind that in order for your brake system to be at its prime performance, you need to have the brakes bled at least once in every two or three years. As time passes and you cover thousands of miles, small volumes of air can get trapped into your car’s brake line. This creates a weird sort of spongy feeling when putting your foot on the pedal. If there’s lots of air developed into the brake line, it is not a good sign. Your car may be at a high risk of suffering from a total Brake Failure, putting your life at risk.
You are probably wondering, “How can air get into the brake lines in the first place?” There is no doubt it appears quite mysterious, but air can get quite sneaky at times. It can travel to your brake system during different types of services being done on your car, or in circumstances where there is a leak of some sort. For less obvious reasons though, air can easily pass through into the braking system, if your brake pads are worn out. Regardless, by bleeding your brakes, you remove the air that is trapped in the line, ensuring everything is in tip-top condition.
Things You Will Need
- Hammer
- Masking Tape
- A small pair of vise grips
- Automotive jack and four jack stands
- One Quart of your favorite brake fluid
- An empty quart jar for holding residual fluid
- A proper open-end wrench for your bleed valve (common are M10, M9, and M7)
- 5 feet of 3/16-inch plastic tubing to fit snugly over the nipple on the brake calipers
Gravity Bleeding Your Brakes
Step 1: Raise the Vehicle

Via Youtube.com
Using the automotive jack, raise your vehicle until it is slightly above the ground. Once done, rest your car on the four jack stands and start removing the wheels one by one. Bear in mind that the car has to be supported “evenly” on the jack stands. A slight mistake can result in your car falling from one end and getting damaged. Once the wheels are removed, you will gain access to the brake calipers. This is where you begin gravity bleeding your brakes. A good sequence to follow is; passenger rear, driver rear, passenger front, then driver front).
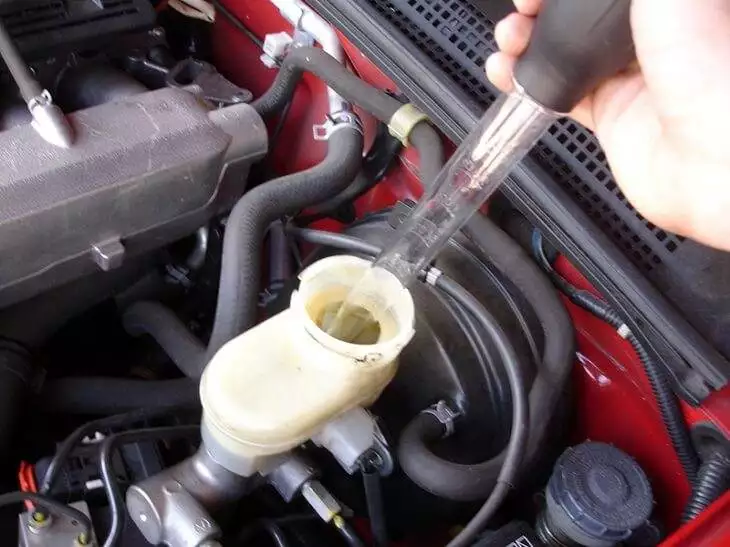
Step 2: Find The Brake Fluid Reservoir
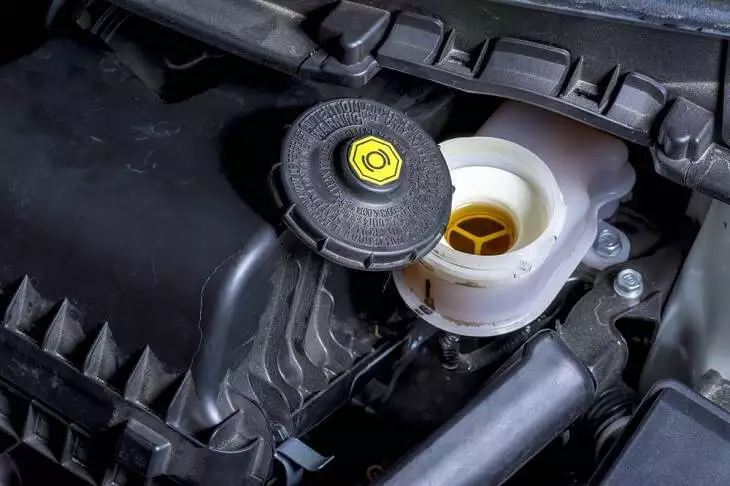
Via yourmechanic.com
Try locating the brake fluid reservoir next to your brake calipers. Once found, loosen the cover and the bleeder caps with the vise grip pliers. Be very careful while removing the covers and caps, so that you don’t damage anything. If the bleeders are dripping fluid, tighten the caps just enough so they are not weeping. If you don’t have vise grip pliers available, it is advised not to move on. This tool is crucial especially on the smaller M7 bleeders found on early calipers, as they get stuck and strip (even with a flare wrench of 6-sided box-end). Other calipers have large bleeders, so vise grip pliers are essential.
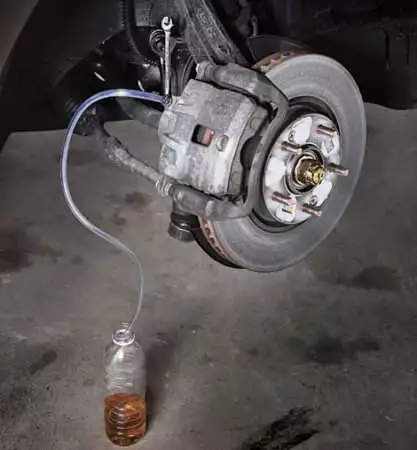
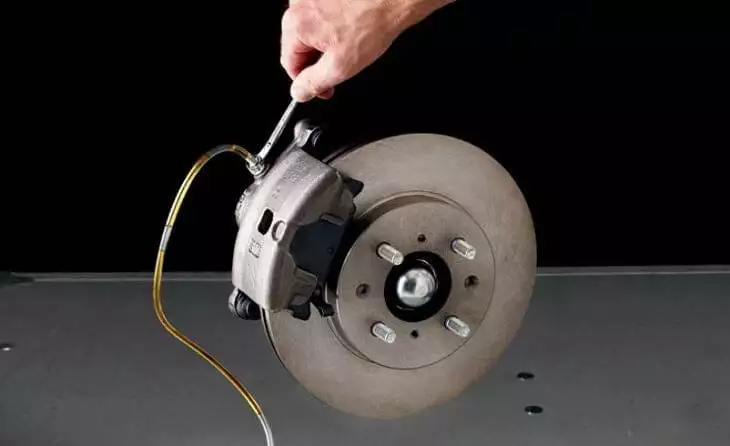
Step 3: Attach The Plastic Tubing
At the first wheel, place one side of the plastic tubing over the bleeder, while raising the other end to make sure it stays above the fluid reservoir. It is crucial that the tubing is extended to a level higher than the reservoir for optimal air cleaning. It should typically hang down from a supported stick, c-pillar, or garage doorframe to the caliper. Most vehicle owners usually secure the tube with masking tape to the c-pillar or roof the car. Go with whatever option works best for you.
Step 4: Time For Releasing The Air Bubbles
For this step, you have to be very careful. A simple mistake could have you doing the entire process again. Slowly open the bleeder nipple with an open-end wrench. By doing this, you should now begin to see the fluid rising in the plastic tubing. You can easily notice the air bubbles escaping. The fluid will continue to rise until it reaches the height of the brake fluid reservoir in the car. This may take approximately 3 to 4 minutes, so you need to be patient.
To speed up the process and boost the effectiveness of the Gravity Bleeding, tap the brake calipers a few times with the wood handle of any standard hammer or a rubber mallet. This will force the bubbles to rise up through the tubing until air no longer emerges from the bleeder. Check your brake fluid reservoir and ensure it is properly topped off.
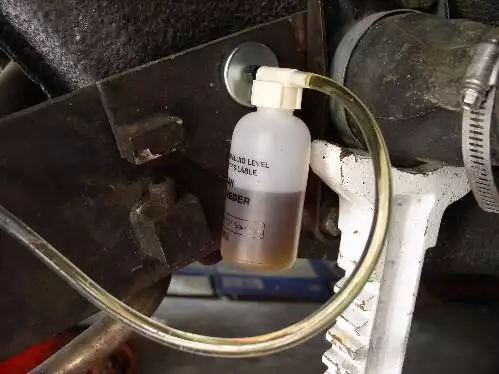
Step 5: Close The Bleeder And Replenish Brake Fluid Reservoir
Via s2ki.com
Once all the air bubbles have ceased, tighten the bleeder, and pull the tubing off, while holding the jar to catch the fluid. It may seem confusing, but take it one step at a time. First, set the jar below the nipple. Second, use a wrench to close the bleeder. Third, pull the plastic tube off it. If the brake fluid in the reservoir is not up to its required levels, top it off with fresh fluid.
Bear in mind that you have to monitor the brake fluid during the bleeding process. You need to keep the levels full while bleeding. Otherwise, if it goes too low, you will only cause more air to get into the brake line and system. This means you will have to start over the entire process. It is a good idea to have a helping hand with you, who can monitor the levels and replenish the fluid when it gets less, as soon as you remove the tubing and tighten the bleeders.
Step 6: Bleed The Remaining Brakes
Follow these steps for bleeding the brakes. You have to top up the brake fluid in the reservoir after bleeding each brake to ensure levels are topped off the entire time, preventing more air from entering into the braking system. Bear in mind the amount of time you may have to leave the bleeder open while bleeding brakes varies. However, as a general rule of thumb, let it bleed until the fluid runs clear and free of bubbles. Once you completed bleeding the brakes from all four sides, tighten the bleeder caps with the vise grip pliers at each wheel.
Step 7: Test Drive And Troubleshooting
After you have tightened the bleeder caps, equip the wheels and lower the car. Take the vehicle out for a test drive and put a little pressure on the brake pedal. If it feels firm when depressed, it means the gravity bleeding worked. If the brake pedal holds constant pressure, without dropping, all is good. However, if you depress the pedal and feel it’s still mushy, or rock hard, it may mean the Master Cylinder is defective or full of air. To ensure your safety, it is advised that you take your vehicle to a mechanic and figure out what’s causing the MC not to function properly. It may also be possible that there is a leak in the braking system.
Now that you are familiar with the steps mentioned above, gravity bleeding your brakes shouldn’t be a problem. Note: While gravity bleeding is the simplest and most effective method for brake bleeding, it only applies to firewall mounted systems, where the MC is considerably higher than the brakes of the wheels. If you have an underfloor mounted street rod system, you cannot enjoy the simplicity of a gravity bleed and may have to opt for pressure, bench, vacuum, or reverse brake bleeding.