According to Repair Pal, an estimation service on car repairs the average cost to have your oil pan gasket professionally changed is $474 and $580! The cost for the mechanic’s labor alone is $130 and $145 I happen to think that’s outrageous.
Using synthetic oil member reviews the pricing for an oil change was an oil change typically costs $20 to $55. Using synthetic oil bumps the price to $45 to $70 on average. In my area of the country (United States, all prices are U.S. dollars) it’s $19.95 at Uncle Ed’s Oil Shoppe. Using synthetic oil generally bumps it up to $20.00 or so.
Now I happen to think mechanics have more difficult jobs to deal with than an oil pan gasket. Besides, that’s a lot of money for two or three hours of work that you or I could do with the right tools (and that’s really all it takes, a little knowledge, and the right tools).
More...
What's Involved
You’re going to have to change your oil (and you might as well change the filter unless you had your oil changed recently). Then you’ll have to drop (remove) the oil pan, clean it, check it for cracks, clean the old gasket off it and the engine casing. Then you’ll need to put the new gasket on, put in the new oil filter (if you removed the old one), and add the new oil.
Tools Needed
If you don’t already own the tools, the jacks and stands or ramps; catch pan, and so on you now have the tools to change your oil from now on (and to do other projects with the help of manuals easily obtained from oil filter for your car). The following are the tools you’re going to need:
- Floor jack and 2 jack stands; or two ramps
- Chocks, cinder bricks, old 2 x 6 pieces of wood (if you’re using ramps) can also be used
- Catch pan (oil basin)
- Wrench
- Ratchet and socket
- Swivel socket
- Long ratchet extension (comes with most socket sets)
- Rubber mallet
- Pry bar (if necessary)
- Gasket scraper
- Safety glasses
- Recommended oil filter for your car
- Recommended five quarts of oil for your car
- Oil filter wrench
These are the seven steps we’re going to follow to save you money now and down the road with oil changes.
- Check your oil pan for leaks and any cracks or damage.
- Drain the oil and then remove the oil filter (you will have to put in new oil and filter when done with replacing the gasket).
- Remove engine oil pan and gasket.
- Clean oil pan.
- Install the new gasket.
- Install oil pan.
- Add new engine oil and filter and then run the engine to check for any leaks.
The Oil Pan And Gasket's Purpose
The purpose of your oil pan and gasket is two-fold. As your engine runs, oil to lubricates the moving parts inside your engine. This includes the pan. Your engine is under pressure while it is running (not much, but some), and gaskets prevent fluids from squirting out while the engine runs. The second part is when you turn your engine off. Fluid follows gravity; it runs downhill. The pan collects much of your car’s four to six quarts of oil.
How Will You Know It's Time To Change Your Gasket?

How will you know it’s time to change your oil pan gasket? You’re noticing fresh oil spots under your car. Or, if your oil needs topping off, and you just had it changed or topped off not that long ago this indicates you have a leak somewhere. Your “Check Oil” light might be coming on. Now you need to start paying attention and observing.
What You Need To Do?
Most garages, driveways, parking aprons, and such are already covered in stains from years of accumulated spills, drips, leaks, and whatnot. After you park your car, place a large piece of white paper underneath your pan. Yes, it’s a pain to do to get on your knees and slide it underneath there, but it’ll pay dividends later.
Are there splotches of oil consistently day after day? When you drive your vehicle you should see whether or not there is smoke coming from underneath or out of the back-end; gray-black in color? These are indicators of an old, brittle, and cracked pan gasket. It is also an indicator of a cracked oil pan.
As I’ve discussed, the oil is collected and stored in the pan when your engine isn’t running. Over time, the gasket will fail even more until you are constantly losing oil, to the point where you could damage your engine. So, it’s time to change your pan gasket.
Changing The Gasket
Step 1: Check Oil Pan For Leaks
You’ll need to go to your auto parts store and buy the right gasket and materials for your make and model of your vehicle. Name brands come with everything you’ll need, sealants and so forth. If you don’t have one already, you’ll need a catch basin for your used oil. And you’ll need a new oil filter for the make and model of your car.
When you return home, carefully drive your vehicle up to your ramps, or manually jack your vehicle up. Wait an hour for your engine to cool. The typical temperature is between 195- and 220-degrees Fahrenheit, and so is the oil.
Step 2: Drain Oil And Remove Filter
Caution: Put your safety glasses on! Remove the drain plug from the pan. THIS is MESSY. You WILL get oil on at least one of your hands or arms or both. Let the oil drain for 30 minutes into the drain pan. Even after 30 minutes, there will still be oil dripping out throughout the changing process.
Note:
- Some drain plugs are on the side, Others are on the bottom of the pan.
- Some oil filters are also to the side and, some are on top of the engine; point is,
you may have to look for it.

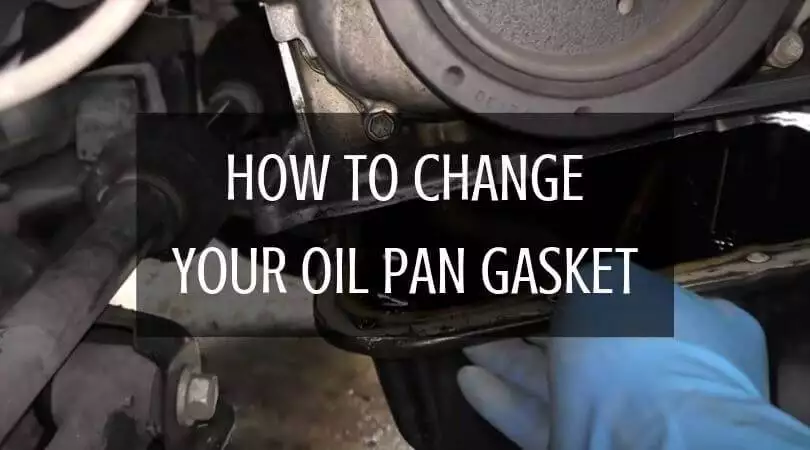
Step 3: Remove Oil Pan And Gasket

Using a swivel socket (long ratchet extension and ratchet, if necessary), unscrew the oil-pan mounting bolts from around the pan flange. Lightly strike the pan at one corner with a rubber mallet to break it loose. You may have to hit it multiple times. (NOT HARD!). It might be necessary to use a small pry bar to pry the edge lose.
Step 4: Clean The Oil Pan

Scrape the old gasket material/ silicone from the pan and engine block mounting surfaces. I suggest a gasket scraper and be careful to avoid damaging the mounting surfaces. Clean all surfaces with an engine solvent. Clean the inside of the oil pan and inspect it for cracks.
Step 5: Install New Gasket

Install your new gasket following the packaged instructions using the provided materials. Most gaskets are cork or some other flimsy material that is good with heat and cold, so be careful handling it.
Step 6: Install Oil Pan And Gasket
Use thread sealer if the package instructions show to do so. Torque the oil pan bolts on in a spiral pattern per specifications beginning with the center bolts. Reattach any accessory brackets, splash plates, and so on. Make sure the drain plug is in and torque to specifications.
Step 7: Install Oil Filter and Oil
Install the new oil filter, be sure to put some of the old oil on the rubber gasket on the end of the filter. Hand tightens it. Put in the manufacturer’s recommended number of quarts of oil and the brand of oil you prefer. Name brand oils tend to be of better quality. Now run your engine for five minutes or so to see if there are any leaks from the pan or oil filter.
IMPORTANT: It’s important to dispose of the used oil in an environmentally safe manner. Contact your city, county, or township for instructions if you’re not aware of them. Pouring used oil and gasoline into the city drainage system can gain you a hefty fine!
Conclusion
So, you’ve had a couple of hours of fun and frustration (don’t lie, not everything went perfectly), but you came out with the satisfaction of completing the job. You’re probably messy, sweaty, but you’re proud. And you should be.
I hope you enjoyed and learned something. I always like to learn ways I can save money by doing things myself. I bet you like saving money (I don’t know anyone who doesn’t). If this helped you or you think of someone you believe this article might be of help to them, please share. And please share your comments in the comment section. And thank you for reading!